


The Add Items And Delete Items screen allows the user to upload additional items to the assortment or delete the from future assortments.
The screen is primarily used to add items to a project that have been found as assortment opportunities in the market or future new lines. The user can input data from GFK or any other source of market information to add products to the assortment.
Products added in this way will only exist in the Retailigence assortment and will still need to be created in the retailer’s legacy systems.
NOTE – Added products affect the whole product group and will appear in other projects that contain the product group.

Add Items
There are three tabs under the Add Item heading:
- External Items Manual – new ‘dummy’ items created by the user
- External Items Automatic – New items appearing following an update from an external data feed, for example, Neilsen or GFK
- Internal Items – New lines appearing in Retailigence systems following their creation in the retailer’s legacy systems
External Items Manual – Creating a New Line
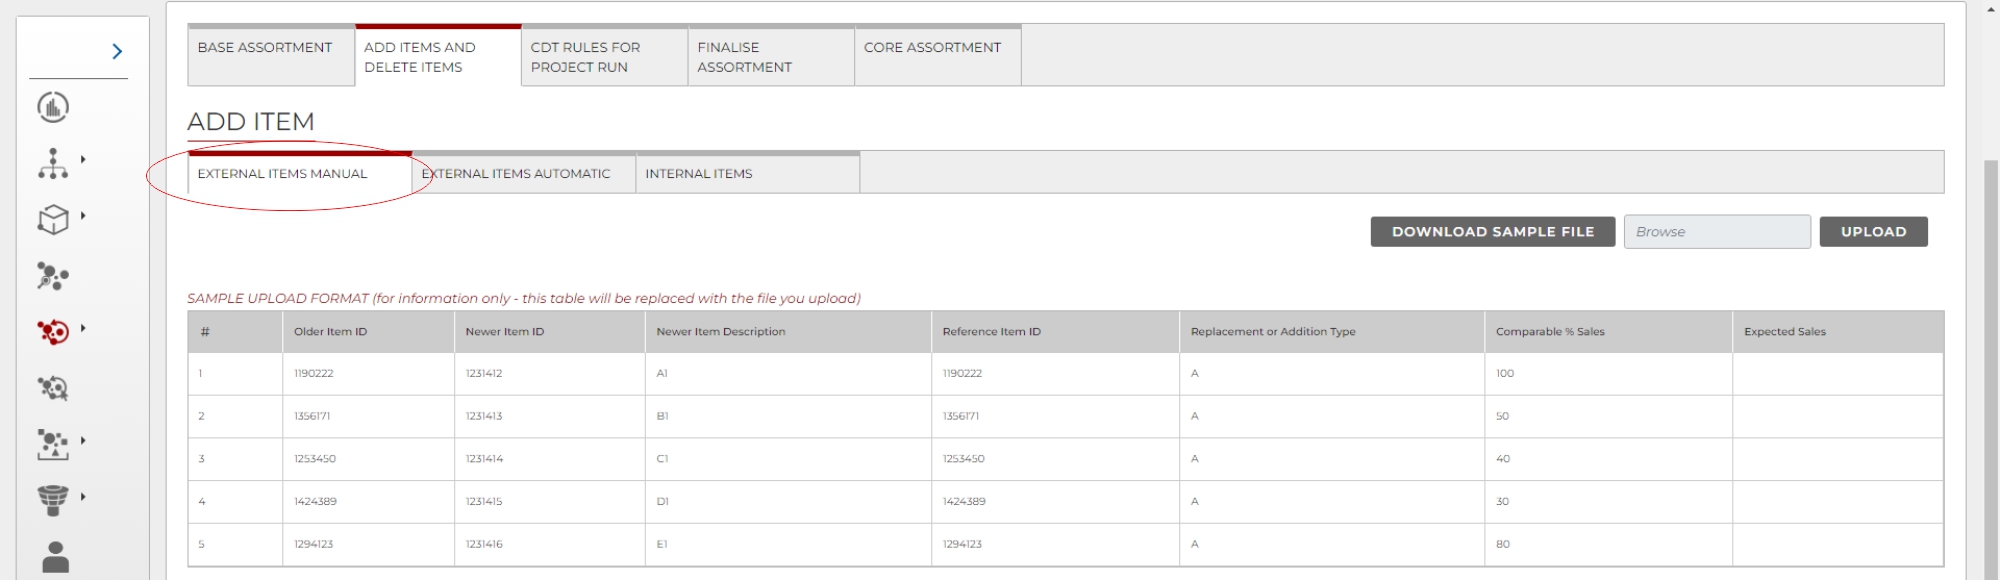
This allow the user to set up a ‘dummy’ new line within the AO tool ahead of the line formally being created within the retailer’s other systems. This is useful given that the creation of future assortments often happens many months before the planned instore implementation data and sometimes the admin of setting a new line up in legacy systems may not have been completed at this point in the category management process.
- Download Sample File – Downloads an example file of what the upload file structure should look like. This can be edited and renamed to create the upload file.
- Upload File – Uploads the file for processing.
The downloaded file appears as below. (Fig. 2)
The user should save the file locally so that they can edit the file and re-upload once ready.
There are 2 types of additions that the user can make using the upload.
Replacement – Upload an item with an “R” in column D and it will replace the item that is listed in column A. Required data columns: A, B, D, G & either E or F. (Rows 4&5 in Fig 2.)
Add – Upload an item with an “A” in column D and it will add an item. Required data columns: B, D, G & either E or F. If using column E, column C will need to be populated as comparable sales % will refer to this item. (Rows 1&2 in Fig 2.)
Fig 2. Download Template Screen

The column functions are as follows.
- Older Item – Only required when using addition type “R”. A Newer item replaces this item and copies its attributes.
- Newer Item – Provide an item number for your uploaded item. Blank records will receive a computer-generated code. (e.g. REF20433)
- Reference Item – Required when using addition type “A”. This should be a currently ranged item that the new item can copy attributes and sales from.
- Addition Type – “A” to add an item, “R” to replace an existing item. If this field is blank, the default will be addition.
- Comparable % Sales – When adding or replacing, gives the new item a sales figure based on a percentage of the older/reference item. The value should be an absolute value (E.G. 150 for 150%). Do not enter values as a percentage.
- Expected Sales – Used to directly input the sales for the newer item.
- Newer item Name – Name of the newer item.
Once uploaded the screen will look like below.
Fig 3. Add Items Screen (uploaded)1. Add/Edit Attributes – Allows the user to edit the uploaded product’s attributes. (Fig 4)

- Item Select – Select items to add/edit attributes. If an item replaces an older item, the newer item inherits the attributes of the older item by default.
- Process Items – Processes all of the items below (Step 2) to add them to the project. The check status button appears when the items are processing and can be clicked to check to see if the dashboards have been updated with the new items. Processing can take a few minutes as the assortments need to be rebuilt to accommodate the new items.
Fig 4. New Item Attribute Editing

Delete Item
Delete Item allows the user to remove items from the assortment, in the Retailigence project.
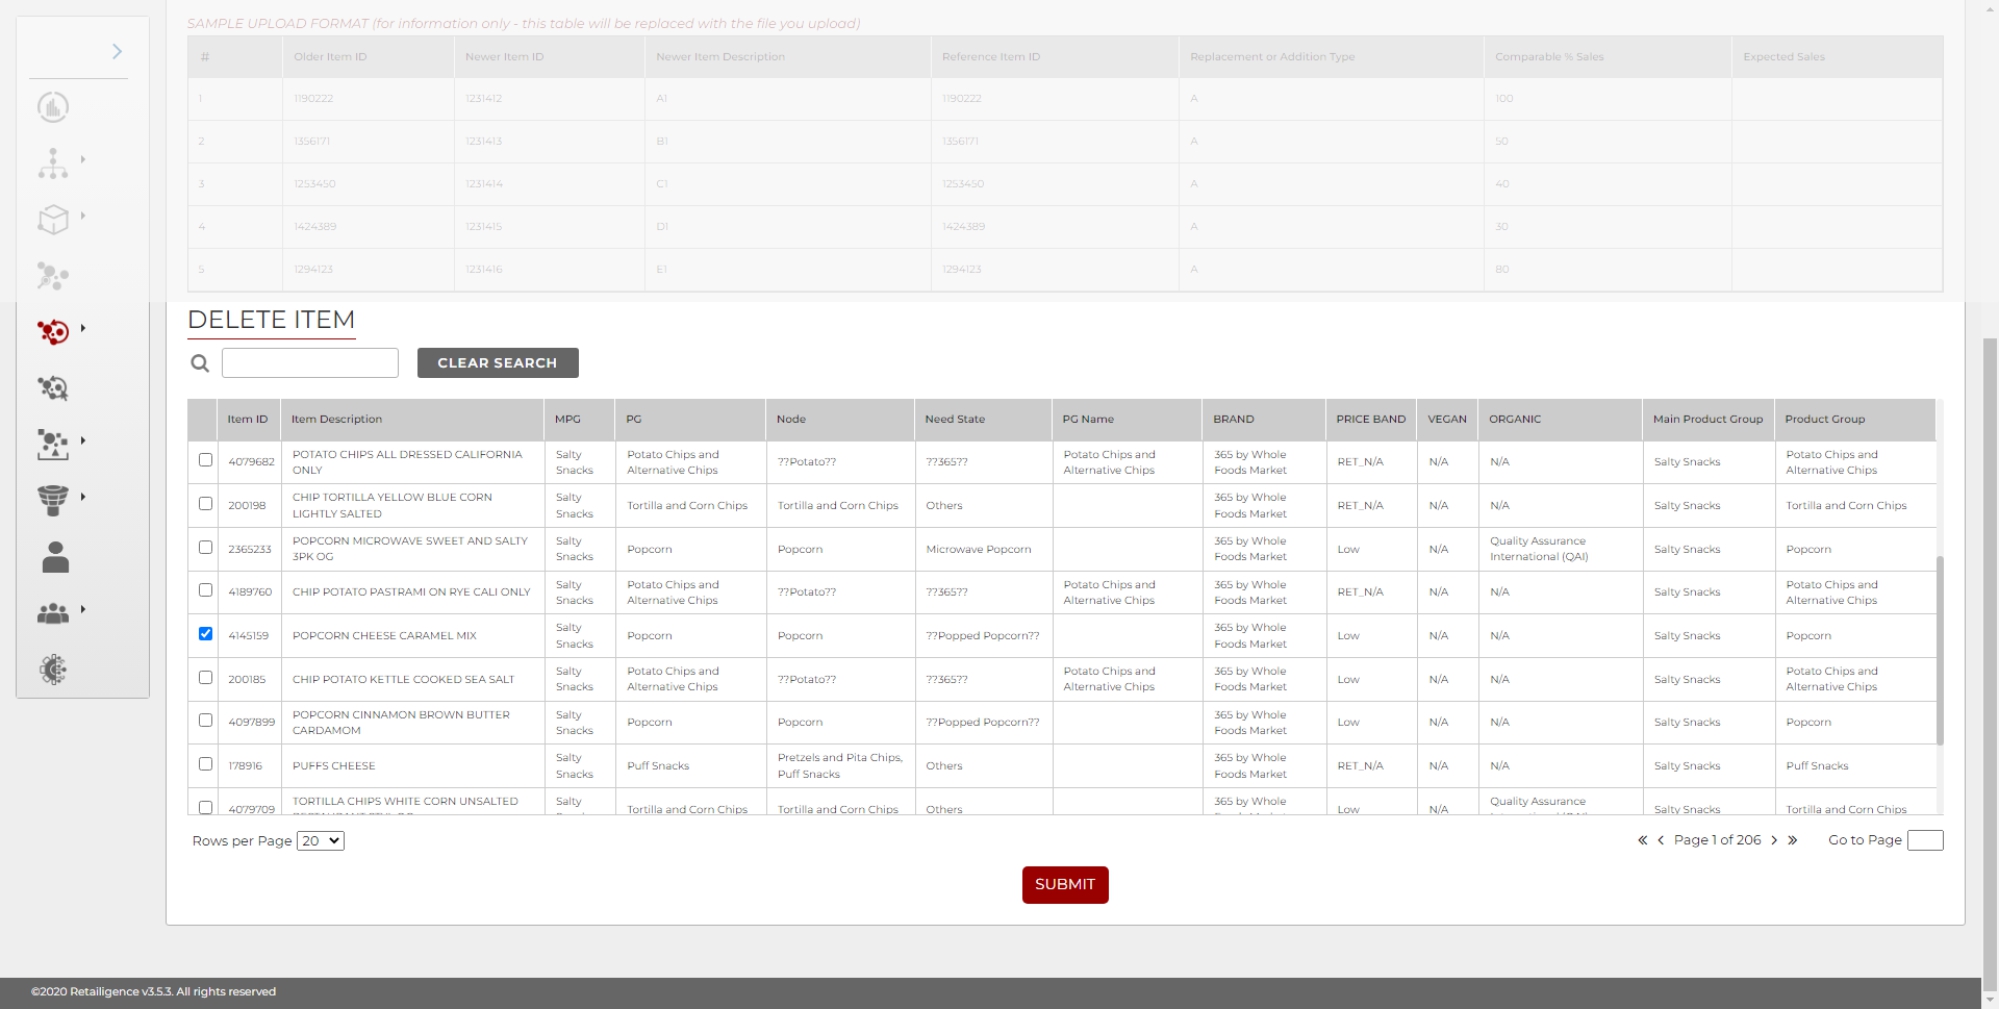
This action will not delete the item from the retailer’s master data or other projects. The screen is primarily used to remove items from a project that may have been part of the data selection but are not required in the final assortment (ie. eliminated lines).
NOTE – Deleted Products will not appear in projects created in the future.
- Search Bar – Allows the user to search all columns in the table.
- Clear Search – Allows the user to remove the current search filter.
- Item List – A table showing the items in the project. The selection box allows the user to select multiple items to delete from the assortment.
The table displays 20 items by default. There is an option to increase this under the table. There is also a left and right arrow to scroll to other pages within the table.
Deleted items appear in red, as seen below.

Pressing the Submit button at the bottom of the screen will process either the addition of selected new lines or the deletion of selected lines for deletion.